
How to Use GPT Image 2 for BioShock Rapture Key Visuals
A step-by-step guide to generating BioShock: Rapture key visuals with GPT Image 2: read the world, choose a consequence, write the six clauses, render a city frame and an event frame, then run the Krea 2 comparison.
What You Will Make
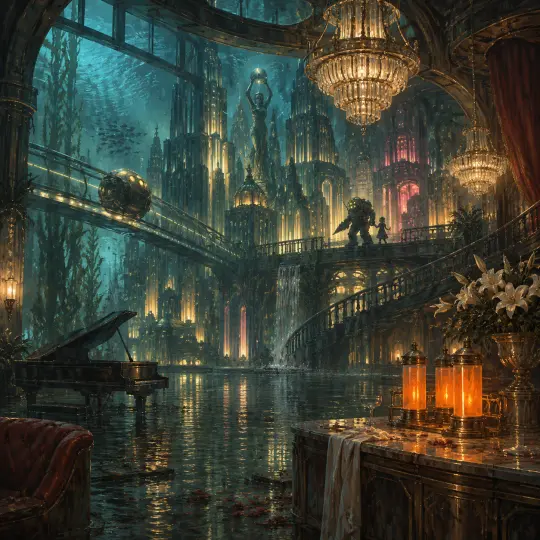
This guide walks through generating a BioShock: Rapture key visual with GPT Image 2 — from reading the world cards to publishing a finished render attached to the world. By the end you will have two frames: a city establishing shot and a single event beat, plus a Krea 2 comparison on the same prompts. The four published images on this page are the reference output.
Before You Start
You need a world with a rule, not just a mood. Write down four things before you open the generator: the sealed place, the scarce substance, the founding law and the class that pays for it. If you cannot state all four in one sentence each, the render will be decorative and you will blame the model for a writing problem.
For Rapture the four sentences are: a city under the Atlantic with no legal exit; ADAM, a body-rewriting substance harvested from sea slugs; no gods or kings, only man; and the poor, the spliced and the orphaned pay for everyone else's splice.
Step 1 — Read the World Before You Prompt
Open the world and read the cards in order: rules first, then factions, then characters, then locations, then events. The order matters because the rules explain why the factions are desperate, the factions explain why the characters make the choices they do, and the locations are where those choices become visible. If you read the locations first you will generate scenery. If you read the rules first you will generate scenes.
Then choose the two sentences that will govern your prompt. For this world they are: "the free market sold the citizens their own bodies" and "the sea is patient". Every visual decision should be traceable to one of those two ideas.
Step 2 — Choose the Consequence
A consequence is the smallest unit of plot: somebody pays for something. Pick one from the timeline or invent one that obeys the rules. The frame should catch the payment in progress, not the aftermath. That is the difference between a key visual and a wallpaper.
Step 3 — Write the Six Clauses
The recipe used for all four published renders is one sentence with six clauses. It is not magic; it is a way to make sure the model receives a subject, a place, a story, a light, a palette and a refusal list before it starts improvising.
Subject with a job
A founder at a podium, a survivor with no memory, a surgeon between operations. Name what they do, not just who they are.
Room with a history
A ballroom after New Year, a hospital wing after a cosmetic trial, a smuggler's dock at low tide. The history justifies the props.
Consequence in progress
Draining, locking, selling, stitching, hiding. One verb that costs the subject something.
One dominant light
Warm chandelier plus amber canisters, or cold glass light plus one red exit sign. One key, one accent.
Restrained palette
Brass, oxblood, ivory, deep teal, ADAM amber. Five colours maximum, and forbid the palette of a different genre.
Explicit negatives
No text, no watermark, no logo, no dry floors, no scuba gear, no modern signage. Refusals are part of the direction.
Step 4 — Render the City Frame
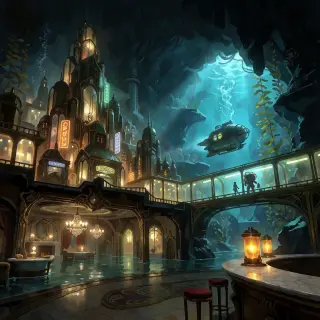
Start with the establishing frame because it calibrates everything else. Use GPT Image 2 at a 1:1 square frame, 1254×1254, one image per request. The prompt should place the camera in a social space — a ballroom, a bar, a lobby — with the city visible beyond the glass. The room proves the promise; the water proves the cost.
If the room looks dry, add a waterline and a reflection. If the city looks like a generic sci-fi skyline, name one art-deco feature explicitly: a brass railing, a stepped tower, a chandelier, a sunburst arch. If the frame looks like a poster rather than a place, add one imperfect detail: a fallen chair, a spilled glass, a torn banner. Perfection is what makes AI architecture look fake.
Step 5 — Render the Event Frame
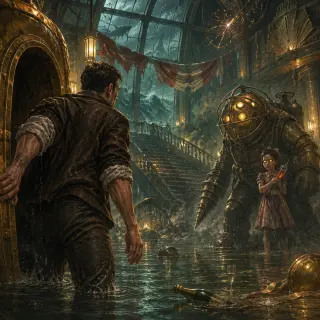
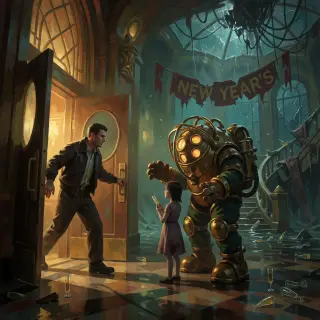
The second frame tests the opposite skill. No panorama, no skyline, no crowd. One threshold, two parties and a date. Put the camera at a door, a hatch or a gate, because Rapture is a city of locks and a threshold makes the politics physical. The event frame should feel like a scene that was already happening before the shutter.
Step 6 — Run the Model Comparison
Send the identical sentence to Krea 2 once. Do not rewrite it for the second model; the point is to see what each model protects. GPT Image 2 tends to preserve material logic, depth and human weight. Krea 2 tends to preserve silhouette, colour separation and thumbnail readability. Publish the pair and caption the difference rather than declaring a winner.
A useful comparison names the trade-off: GPT Image 2 gives you a room you can inspect; Krea 2 gives you a cover you can click. That sentence is more valuable to a reader than a score out of ten.
Step 7 — Fix the Frame, Not the Model
Most bad Rapture renders are prompt problems wearing a model's clothes. If the frame is flat, you probably gave two equal key lights. If it looks like generic cyberpunk, you named neon but not brass. If it looks like a horror level, you led with a monster instead of a room. If it looks clean but dead, you forgot the imperfect detail that proves people were there.
The most reliable fix in this genre is to add a witness. A frame with a person in the foreground who is looking at the thing you want the viewer to notice will organise the composition for free. The second most reliable fix is to add water where it should not be: at the base of a door, under a chair, halfway up a staircase. Water is the world's clock.
Step 8 — Publish and Link the Renders
Publish each render as an image attached to the world, with the prompt and the model recorded alongside it. Link the pair so a reader can compare them without hunting. The world page, the use-case page and this guide should all point at the same four assets; that is what makes the set read as a coherent body of images rather than four lucky generations.
Prompt → Frame
Use the six clauses to produce one frame that can carry a page. Keep the negative list fixed across the set.
Frame → Pair
Run the same sentence through both models. Publish both, caption the trade-off, and let the reader choose.
Pair → World
Attach the renders to the world so the cards explain them. The images become evidence rather than decoration.
Prompt Template You Can Reuse
BioShock: Rapture key visual, semi-realistic painterly digital painting, cinematic.
[SUBJECT WITH A JOB] in [ROOM WITH A HISTORY],
[ONE CONSEQUENCE ALREADY IN PROGRESS],
[ONE DOMINANT LIGHT] against [ONE ACCENT],
[FIVE-COLOUR PALETTE: brass, oxblood, ivory, deep teal, ADAM amber],
visible brushwork, controlled hard and soft edges, volumetric haze,
no text, no watermark, no logo, no dry floors, no scuba gear.
Common Mistakes
Checklist Before You Publish
- Is the subject doing a job, not just standing?
- Does the room have a history visible in the props?
- Is a consequence already in progress?
- Is there one dominant light?
- Are there five colours or fewer?
- Is there water where it should not be?
- Is there no readable text (or only deliberate art-deco signage)?
- Does the image still work without the caption?
- Is the prompt and model recorded next to the render?
Frequently Asked Questions
- How long does one frame take? The prompt takes longer than the render. With a clear six-clause sentence, GPT Image 2 usually returns a usable frame in one or two attempts.
- Do I need a reference image? No. All four renders here used text-only prompts. Use references when you need a recurring character, not for a single establishing shot.
- Why square? A square survives every crop: card, header, social post. Choose a wide frame only when you know the final placement.
- Can I use Krea 2 instead? Yes. The recipe transfers; the trade-off changes. Krea 2 will give you a cleaner poster and less material detail.
- Is this official BioShock art? No. It is an independent AI world built around the tone and politics of Rapture, with original renders and original text.
Next Steps
Once the two frames hold together, extend the set. Add a portrait for each faction, a plate for each district and a four-poster timeline of the fall. Keep the palette and the light logic fixed and change only the subject clause. That is how a single key visual becomes an art department.
Put the Guide into Practice
The world is open. Take the six clauses, keep the brass and the pressure, and publish your own pair of Rapture frames.
The four renders in this guide are published from the BioShock: Rapture world. Open the studio to fork the cards, or start from the same anatomy with your own sealed city and your own scarce substance.