
How to Use GPT Image 2 for Metroid Character Key Visuals
A step-by-step guide to generating Metroid-style character key visuals with GPT Image 2: read the world, choose the cost, write the six clauses, render the hunter and the room she is afraid of, then compare against Krea 2 without rewriting a word.
What You Will Make
By the end of this guide you will have two published key visuals from one Metroid-style world: a character poster that reads as equipment, and a room that reads as an institution. Both will come from the same six-clause brief structure, and both will be attached to a world with their prompt and model recorded.
Before You Start
You need a world, not a mood board. Write down four sentences before you open the generator: what is contained, who was built to contain it, which institution wants the container open, and what the first room looks like. If you cannot write the fourth, you do not yet have a visual world — you have a premise.
- Contained: a parasite that copies a host's DNA and wears its shape.
- Containment: a predator bred by a vanished civilisation, intelligent enough to imprint.
- Institution: a federation that clones the predator and files it under pest control.
- First room: a catwalk inside a ribbed Chozo corridor, wet stone, teal light, one warm silhouette.
Step 1 — Read the World Before You Prompt
Open the world and read the cards in order: rules first, then factions, then locations, then characters. The rules tell you what the world believes; the factions tell you who disagrees; the locations tell you what the rooms cost; the characters tell you who has to pay. That order matters, because a character prompt written before the rules becomes a costume.
For this world the two governing sentences are simple. The Metroids were a lock, not a weapon. And the only person the Chozo trusted with that truth is the woman wearing their last suit. Write those two sentences at the top of your brief; they will keep the palette and the politics aligned even when you change the room.
Step 2 — Choose the Character and the Cost
A character frame needs a cost, not a pose. “Standing heroically” gives the model nothing to draw. “Cannon raised and venting, corridor behind her, floor wet” gives it an action already in progress and three objects to resolve. Choose the cost first, then the stance, then the equipment.
For this world the reliable costs are inheritance, exhaustion and scale. Inheritance puts the last working example of a dead civilisation on the character's body. Exhaustion puts repairs on it. Scale puts a human-sized figure at the bottom of a room built by something much larger.
Step 3 — Write the Six Clauses
The recipe used for every published render is one sentence with six ordered clauses. Order does the work: it forces decisions in the sequence a picture is actually read — genre, subject, action, place, light, framing.
Medium and genre
Stylized semi-realistic 3D game art. Name it first or the model picks a different century of science fiction.
Subject and equipment
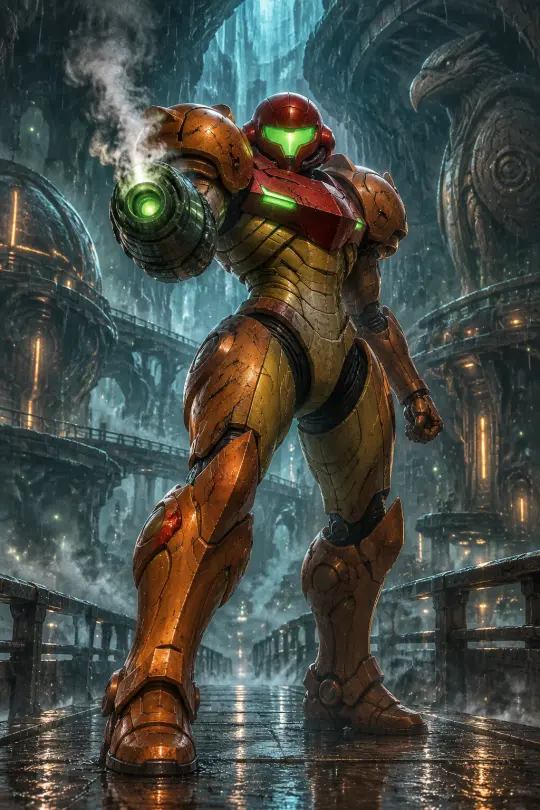
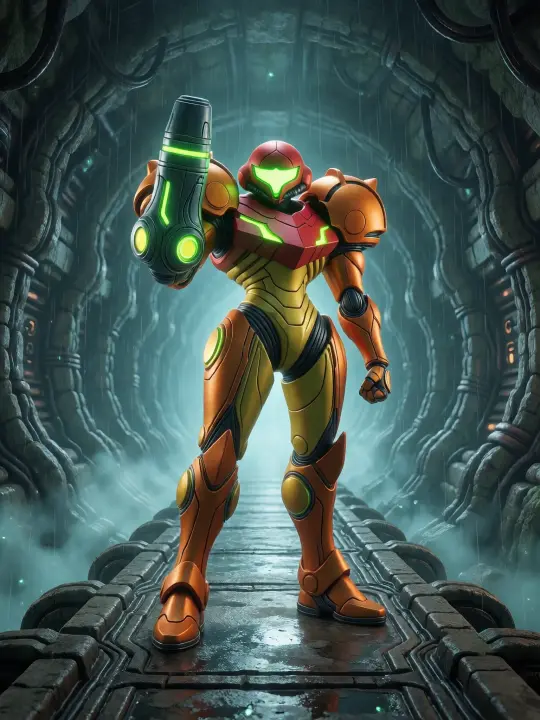
Samus Aran in her orange-and-red Varia suit, green visor, arm cannon, segmented pauldrons. Objects identify the character.
Action with a cost
Cannon raised and venting steam, standing on a rain-slick catwalk. A verb makes it a poster instead of a turnaround.
Place with a scale object
A cavernous ribbed Chozo corridor of stone and machinery. The room has to be bigger than the character.
Light and palette
Cold teal backlight, warm orange armour, volumetric mist, drifting spores. One warm key against one cold fill.
Framing and negatives
Cinematic vertical character poster, dramatic rim light, no text, no watermark. The negative clause is part of the art direction.
Step 4 — Render the Character Frame
Set the size before you write the prompt. A character poster wants 1024×1536; a square frame crops the floor reflection that is doing half the lighting work. Use high quality for anything you intend to publish and auto while you are still deciding composition. No reference image: this is a prompt test, not a likeness test.
Read the result in this order: silhouette at thumbnail size, equipment at full size, room behind the subject. If the silhouette fails, fix the pose. If the equipment fails, name more objects. If the room fails, add one architectural noun — ribbed, vaulted, catwalk — and re-render rather than stacking style adjectives.
Step 5 — Render the Room the Character Is Afraid Of
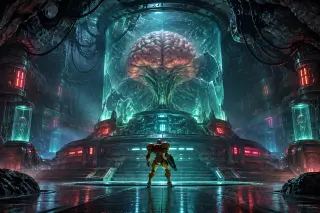
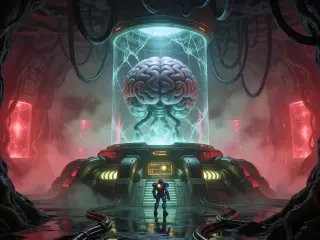
The second frame tests the opposite skill: architecture as antagonist. Write the same six clauses with a room as the subject and a small figure as the scale object. For this world the room is Tourian: a cracked glass cylinder, a circular dais ringed with conduits, red alert strips bolted onto carved stone, cables hanging like roots from a wet ceiling.
Do not add a monster. The machine is the monster, and it is already in the room. The prompt should describe what the room does — contains, watches, waits — through objects rather than adjectives. If you find yourself writing “eerie” or “menacing”, delete the word and add a prop instead.
Step 6 — Run the Comparison Without Rewriting
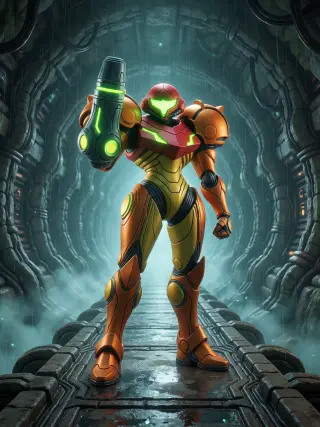
Send the identical sentence to Krea 2 once. Do not shorten it for the new model, do not add a style hint, do not change the aspect ratio to suit it. The moment you rewrite, you stop comparing models and start comparing prompts.
A useful comparison names the trade, not the winner. GPT Image 2 tends to win on objects and depth; Krea 2 tends to win on contrast and mood. Publish both and let the pair carry the argument.
There is one legitimate reason to rewrite: the second model's parameter limits. Krea 2 tops out at 1024 pixels per side, so a 1536-wide location plate has to be re-sized to 1024×768. Change the size, keep the words.
Step 7 — Fix the Frame, Not the Model
Most bad renders in this genre are prompt problems wearing a model's clothes. Text artifacts come from signage-shaped objects in the brief. Material drift comes from vague nouns — “metal”, “stone”, “ruins”. Symmetry collapse comes from too many props. Address the cause, not the symptom.
The most reliable fix is to remove one object and add one witness. A frame with four props and a person watching is legible; a frame with nine props and nobody is wallpaper. If a render feels empty, you usually need a scale figure, not more detail.
Text appears
Add “no text, no watermark, no signage” at the end, remove sign-like props, and re-render instead of patching.
Materials drift
Name each material twice in different clauses: “carved Chozo stone” in place, “bone-white masonry” in palette.
Room looks flat
Add a wet floor, one hard light source and a small figure. Depth is a composition problem before it is a model problem.
Step 8 — Publish and Link the Renders
Publish each render as an image attached to the world, with the prompt, the model and the settings stored alongside it. Then publish the comparison as a pair. A world page that shows two models on one brief is documentation; a page that shows one image is decoration.
Keep the slugs stable and descriptive. The four works behind this guide are named by world, subject, shot and model, which makes them easy to find later and easy to fork without renaming anything.
Prompt Template You Can Reuse
[IP] character key visual, stylized semi-realistic 3D game art:
[CHARACTER] in [ICONIC EQUIPMENT], [VISOR/EYES], [WEAPON] raised and [ACTION],
[SCARRED/MODIFIED DETAIL] on [ARMOUR PART],
[ROOM] of [MATERIAL 1] and [MATERIAL 2] behind them,
[COLD LIGHT] backlight against [WARM SUBJECT], volumetric [ATMOSPHERE],
cinematic vertical character poster, dramatic rim light,
no text, no watermark.
For a location plate, swap the first two clauses for the room and add a scale figure in the third: “[ROOM] with [CONTAINMENT OBJECT] above [DAIS], one armoured figure at the foot of the platform”. Everything after that stays the same, which is what keeps a set coherent.
Common Mistakes
Checklist Before You Publish
- Does the frame read at thumbnail size without the caption?
- Is there exactly one warm subject and one cold fill?
- Are the two material cultures both visible — carved stone, welded steel?
- Is there a scale object, or does the room have no size?
- Is the negative clause identical to the other frames in the set?
- Is the prompt stored with the work, and is the model named?
- If this is one half of a comparison, is the other half published too?
Frequently Asked Questions
Do I need a reference image for character consistency? +
For a production set, yes. For learning the prompt structure, no: a reference hides which clause failed and makes two models incomparable.
How long should the prompt be? +
Long enough to name six clauses, short enough to read aloud in one breath. The published prompts here are about ninety words.
Why does the visor keep turning into a slit? +
Because “glowing visor” is a mood, not a shape. Say “green visor” and put it in the equipment clause next to the cannon and the pauldrons.
Can this guide be used for other sci-fi worlds? +
Yes. Keep the six clauses and swap the four sentences from “Before You Start”. The structure transfers; the materials and palette do not.
Next Steps
Once the two frames hold together, extend the set. Add a portrait for the antagonist, a plate for the faction's capital and a frame for the event that started the containment failure. Because the clauses are fixed, a fifth frame costs one prompt and one render instead of a new direction.
Use the Guide on This World
The world is open. Take the six clauses, keep the two materials and the one warm subject, and render the frame that proves your version of the story.
The four renders in this guide are published from the Metroid world with their prompts attached. Open the world, copy a brief, change one object, and compare your result against the pair.