Photo & Picture to Pixel Art Converter — Free, Online, No Login
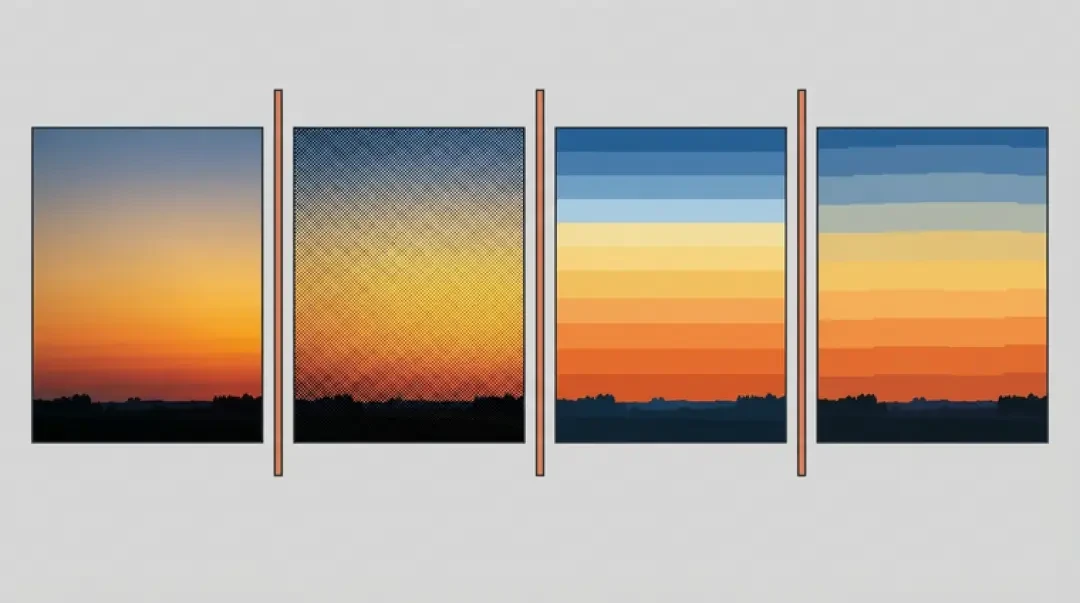
Make your own picture into pixel art
Upload a photo and turn it into pixel art free, in your browser. Set the output size and colour count, download a clean PNG — then walk into a 3D pixel world built from your art. No login.
Turning a picture into pixel art is a downscale followed by a palette reduction, in that order. You drop a photo on the page, set a grid, set a colour count, and download a PNG. The converter runs in the browser on a canvas — the file is not uploaded, there is no account step, and the export carries no watermark.
Two controls decide almost everything about the result. The grid size sets how much structure survives. The colour count sets how much tone survives. Get those two right and the rest — dithering, edge cleanup, export scale — is tuning. Get them wrong and no amount of hand cleanup recovers the image.
Convert a Photo to Pixel Art (Live Tool)
The first screen is the dropzone. Drag a PNG, JPEG, WebP, GIF or BMP onto it, or click to open a file picker. The image is decoded locally and drawn to a canvas. A large phone photo is reduced to a working copy a few hundred pixels on the long edge before any slider touches it, because re-running a full-resolution conversion on every slider move makes the preview unusable.
The path is short and non-destructive: drop the file, choose a grid size, choose a colour count, read the preview, download. The tool holds the working copy in memory and re-runs the downscale and the palette reduction each time a setting changes, so nothing is committed until you export.
Export is a PNG, at 1× or at an integer scale. Scaling is nearest neighbour only. A 64×64 result exported at ×8 is 512×512 with hard 8-pixel blocks. Do not route that file through JPEG afterwards: the compression artefacts land on exactly the edges you just cleaned up, and they introduce colours that were never in your palette.
The two settings that change a picture into pixel art most
Grid size is the number of cells in the output. A 32×32 conversion has 1,024 cells, each one flat. The downscale uses area averaging rather than a smooth bicubic resize, because bicubic rings around high-contrast edges and leaves halo cells that read as dirt. This is the setting that decides whether a face still has eyes at the end.
Colour count is the number of distinct colours in the exported PNG, from 2 up to 64. Reduction runs as a palette build followed by nearest-colour assignment, so the result is a flat indexed image rather than a blurred one. Raise the grid before you raise the colour count: a bigger grid fixes a mushy subject, while extra colours usually just add speckle.
- Grid size16×16 up to 256×256 in fixed steps. This is the cell count of the output; every cell becomes one flat colour.
- Colour count2 to 64 distinct colours in the exported palette. Fewer colours force clearer shapes because the shading has to be spent on connected regions.
- DitheringOff by default. Floyd–Steinberg reproduces gradients at low colour counts, but the noise survives badly through any further scaling.
- Background thresholdA luminance or alpha cutoff makes near-white or near-transparent cells transparent, so the subject lands on a clean alpha PNG.
- Palette sourceAuto palette from the image, or lock to a fixed ramp — useful when several sprites must share one palette.
- Export scale1× to 8×, nearest neighbour only. A 32×32 sprite at ×8 is 256×256 and still pixel-exact.
How to Convert a Photo to Pixel Art
The order of these steps matters. Changing the grid after you have cleaned up a palette discards the cleanup, because the whole image is remapped to a new set of cells.
Work from the final use case backwards. A sprite that an engine will scale ×6 needs fewer cells than the same image printed as a poster, because the engine multiplies every cell on screen.
01
Pick a photo with one clear subject. A portrait against a plain wall converts far better than a group shot at a distance. If the subject covers less than a third of the frame, crop first — the converter will not do that for you.
02
Crop to the subject and prefer a square. Sprites, icons and build plans all assume 1:1. Cropping after conversion costs you cells you have already spent.
03
Choose a grid that matches the output: 32×32 for a character sprite, 64×64 for an icon, 128×128 or larger for a wallpaper. Test 16×16 by shrinking the photo to 16 pixels wide first; if the silhouette is unreadable there, it will be unreadable in the conversion.
04
Set the colour count. Start at 8 to 12 for a character, 16 to 24 for an icon, 32 to 48 for a wallpaper. If the preview looks muddy, raise the grid before you raise the colours.
05
Convert and download the PNG. Use ×1 if a game engine will scale the sprite, ×4 or ×8 if you need a file you can post directly.
06
Check the palette. Open the PNG in a pixel editor and read the colour count. It should equal the number you set. If it is higher, something resampled on export, usually a resize with smooth interpolation enabled.
07
Clean up by hand. Remove isolated cells that read as noise, straighten the outline, and confirm the light comes from one direction. A conversion removes information; it does not invent detail.
Output Size & Colour Count
A 16×16 grid is 256 cells. Every cell is a decision, and there is no room for a cell that carries nothing. If you spend 64 colours across those 256 cells, each colour covers roughly four cells on average. That is speckle, not shading.
A palette reads as shading only when one ramp colour covers a connected region: a cheek, a jaw line, a fold of cloth. Think of the colour count as a budget you allocate to regions, not a slider you push until the preview looks nicer.
Where a picture into pixel art conversion goes wrong
The most common failure is an over-set colour count on a small grid. The result looks acceptable in the preview at 400% zoom and turns into dirt the moment it is shown at 1× in a game or a chat window.
The second is dithering at a low grid. Dither noise is designed to be averaged by the eye at full size; on a 32×32 sprite viewed large, it is just wrong pixels you now have to erase one at a time.
The third is a non-integer export scale. A 32×32 result at ×3 is fine at 96×96; a fractional scale produces uneven cell widths that look like a bad screenshot. The fourth is a compressed source: a JPEG that was already heavily compressed has block artefacts baked in, and quantisation faithfully reproduces them as a crowd of near-duplicate colours.
| Grid | Typical subject | Colour budget | Where it breaks |
|---|---|---|---|
| 16×16 | Item icon, single object, tile | 4–8 | 256 cells total. A face has no room for both eyes and a mouth. Two subjects become an unreadable smudge. |
| 32×32 | Character sprite, small avatar | 8–16 | Hair strands, text and thin glasses frames vanish. Outlines must be one cell wide or they consume the interior. |
| 64×64 | App icon, portrait, prop | 16–32 | Background texture starts to compete with the subject. Busy backgrounds turn into noise and must be flattened. |
| 128×128 | Wallpaper, poster, wall art | 32–48 | The grid is now finer than the detail in most cropped phone photos, so the conversion reproduces camera grain. |
| 256×256 | Large wallpaper, world texture, build plan | 48–64 | Only worth it on a sharp source. Past roughly 128 cells wide, the converter mostly shows you the photo's noise. |
“Picture into Pixel Art” vs “Photo to Pixel Art”
These two phrases return different result sets in search and describe the same operation. One borrows the word picture, the other borrows the camera. Neither changes what a converter does: downscale to a grid, reduce to a palette, export.
On this page they are the same action, and the same tool. Defaults are a 64×64 grid at 32 colours, which is a safe middle for a wallpaper or a large icon. Move the grid first, then the colours.
| Phrase | What people mean | What changes in the tool |
|---|---|---|
| picture into pixel art | A general request. Any image in, any image out, usually something decorative. | Nothing. Default grid 64×64, colour count 32. |
| photo to pixel art | The same action described with a camera word. Often a portrait, a pet or a car. | Nothing. The background threshold gets used more often here. |
| image to pixel art | The same request again, sometimes meaning vector tracing instead. | Nothing, unless the user wants vector output, which this tool does not produce. |
| pixelate a photo | Sometimes means a mosaic or a blur-over rather than a reduced palette. | Use a low grid with a high colour count if a mosaic is actually what you want. |
| 8-bit / 16-bit filter | A colour-depth reference borrowed from older hardware. | Lock to a fixed ramp instead of an auto palette to get that specific limit. |
Image to Pixel Art for Minecraft
Minecraft conversions break the usual rules because the output is not an image, it is a build plan. The grid is the block count, not the pixel count: a 64×64 conversion is a 64-block-wide wall, 4,096 blocks of material. The palette is not chosen by the converter — it is whatever blocks you are willing to gather. In survival that set is small. In creative it is larger, but still finite and unevenly distributed across colour families.
That second constraint is why a photo needs a higher block count than a sprite does. A sprite can spend 16 colours on a face. A wall of wool, concrete and terracotta might give you four usable steps in one colour family, and terrain blocks add their own texture that fights flat tones. Detail has to be carried by resolution instead: doubling the block count quadruples the block cost, and is often the only way to keep features readable.
Plan the grid against the number of blocks you are actually willing to place. A 32×32 wall is 1,024 blocks, which is one long session. A 128×128 wall is 16,384 blocks per layer before you add a second layer for shading. Export the PNG, then use it as a per-cell reference while placing rather than trying to hold it in your head.
Mapping photo pixels to blocks
Convert the photo to a small grid first, then restrict the palette to an allowed block list so every colour in the image maps to something placeable. The useful output is not just the image but the materials list: how many blocks of each type you need, sorted by count. That turns a picture into a shopping list.
Build in layers. Layer one is the silhouette in the darkest tone, layer two is midtones, layer three is highlights and any single-cell detail. If a build template helps, start from a small pixel-styled world such as Mini World and replace its textures with your own conversion, so scale, camera height and block density are already correct.
What You Can Make From a Conversion
Choose the output before you choose the settings, because each output imposes one constraint that overrides everything else.
A sprite that an engine will scale up needs fewer cells and fewer colours than the same image used as a poster. A tile that repeats needs its edges to match before anything else is worth fixing.
- Game spriteConstraint: small grid, low colour count. 32×32 or less at 16 colours or less on a transparent background. Anything larger costs atlas space, and detail added at this size disappears at 1× on screen.
- Icon or avatarConstraint: mid grid, high contrast. 64×64 to 128×128 at 24 to 32 colours. Icons are read small and from a distance, so subject-versus-background contrast matters more than shading.
- WallpaperConstraint: large grid, many colours. 128×128 and up at 32 to 64 colours. A wallpaper is never scaled down by the viewer, so fine cells survive; the risk here is camera noise, not detail loss.
- World texture or tileConstraint: seamless. The left edge must meet the right edge and the top must meet the bottom. Convert a tileable source, or mirror the image on both axes before converting, then repair the seam by hand.
From a 2D Conversion to a Walkable Pixel World
The PNG you download is a texture as well as an image. The 3D game builder reads a PNG, registers it as a material and applies it to geometry in a scene. Put it on a plane at an integer scale and the pixels stay square. Set the texture filter to nearest and disable mipmaps if you prefer hard edges to a soft blend at distance.
The scene embedded below is running in the browser with textures of exactly that kind. You are looking at walls, floors and props textured from small pixel PNGs, where the source grid is treated as the real unit of resolution: each pixel becomes a square on the surface. Character sprites in the scene follow the same rule — a small grid, a small palette, a fixed camera height. Agent Sprite Forge produces character sprites in that format, and they sit on the same texel grid as the environment.
One honest limitation: a pixel texture on a 3D surface does not stay pixel-perfect as the camera moves. Perspective divides the surface unevenly across depth, so a far wall compresses its cells into rectangles while a near wall stretches them. Pixel-art 3D scenes handle this either by locking the camera or by accepting that distance changes the cell shape.
Making the conversion survive the move to 3D
Use power-of-two dimensions — 32, 64, 128, 256 — because those tile cleanly across a surface and divide evenly at every mip level. Keep the texel density consistent across objects: a wall at 128 pixels per metre next to a crate at 32 pixels per metre reads as two different games.
If a texture will repeat, verify the seam before you build with it. Place two copies side by side in a pixel editor and look at the join. A one-cell mismatch on a large wall is visible from across the scene, and it is cheap to fix in the image and expensive to fix in geometry.
More Free Pixel Tools
If you already have a photo, start with the converter on this page. The generator is for when you do not.
- Online pixel art makerDraw and edit a converted PNG in the browser with a grid overlay and a locked palette, so cleanup stays inside the colour budget you set.
- AI pixel art generatorDescribe a subject in text and get a sprite or a scene image with no source photo involved, useful for objects you cannot photograph cleanly.
- Pixel art size guideThe reference table for grid sizes and colour counts per output type, if you want the numbers without running a conversion.
Walk into the world it belongs to
A sprite is a character with nowhere to stand. The last step is the one nobody else offers: take the sheet you just built and put it in a world someone can walk around in — a small island, a planet, a rainy street corner. Every world on this site was made from one written description and published as a page you can play.
FAQ
Is the picture into pixel art converter free? +
Yes. The conversion runs in your browser and the PNG export has no watermark and no paid tier on this page.
Do I need to sign up or log in? +
No. There is no account step, because the image is never uploaded — it is decoded locally and drawn to a canvas in the tab.
What image formats can I upload? +
PNG, JPEG, WebP, GIF (first frame) and BMP. Transparent PNGs keep their alpha as long as you leave the background threshold off.
Does it remove the background? +
Not automatically. There is a luminance or alpha threshold that turns near-white or near-transparent cells into alpha. That works on a plain, high-contrast background and punches holes in the subject on a busy one.
Can I choose my own palette? +
Yes. Auto palette is the default, but you can lock the conversion to a fixed ramp. Lock it when several sprites must share one palette, or when you are matching a specific colour-depth limit.
Is there a size limit on uploads? +
Practical limits, not hard ones. Very large files slow the preview, because every slider move re-runs the downscale and the quantisation. Crop or downscale to a few thousand pixels on the long edge before uploading.
Can I use the result commercially? +
We add no licence restriction and no watermark to your export. The constraints are the ones attached to your source image: converting a photo you do not own does not give you rights to it, and a fixed palette may carry its own licence.
Can I pixelate a photo of a person? +
Yes, and it is the common case. Use a 32×32 to 64×64 grid with 8 to 16 colours, crop tight to the head and shoulders, and expect glasses, teeth and thin jewellery to disappear. The output is a stylised likeness, not an anonymisation tool — at a large grid a face can stay recognisable.
Back to the 3D Game Builder
All 31 finished 3D worlds, games and scenes live on one page — every one of them playable.