Pixel Art Maker — Free Online Pixel Art Editor & Generator
Make your own pixel art maker
A free online pixel art maker: draw on a grid, pick palettes, generate sprites, export PNG — then drop your character into a 3D world you can walk around in. No download, no signup.
A pixel art maker is four things: a grid, a pencil, an eraser, and an export button. Everything else — layers, animation, palette management — is convenience stacked on top of that loop. The editor here runs in the browser. You choose a canvas size, draw with a one-pixel pencil, and download a PNG. No installer, no account, no upload step.
The decision most tools bury: the grid size is the hardest thing to reverse. Everything downstream follows from it — how many pixels a face gets, whether an eye is one pixel or two, how the sprite survives a 4x upscale in a game engine. This page covers the editor itself, the grid math, drawing versus generating a sprite, palettes as a budget, and how to take the character you just drew and put it into a 3D world someone can walk around in.
Pixel Art Maker (Live Canvas)
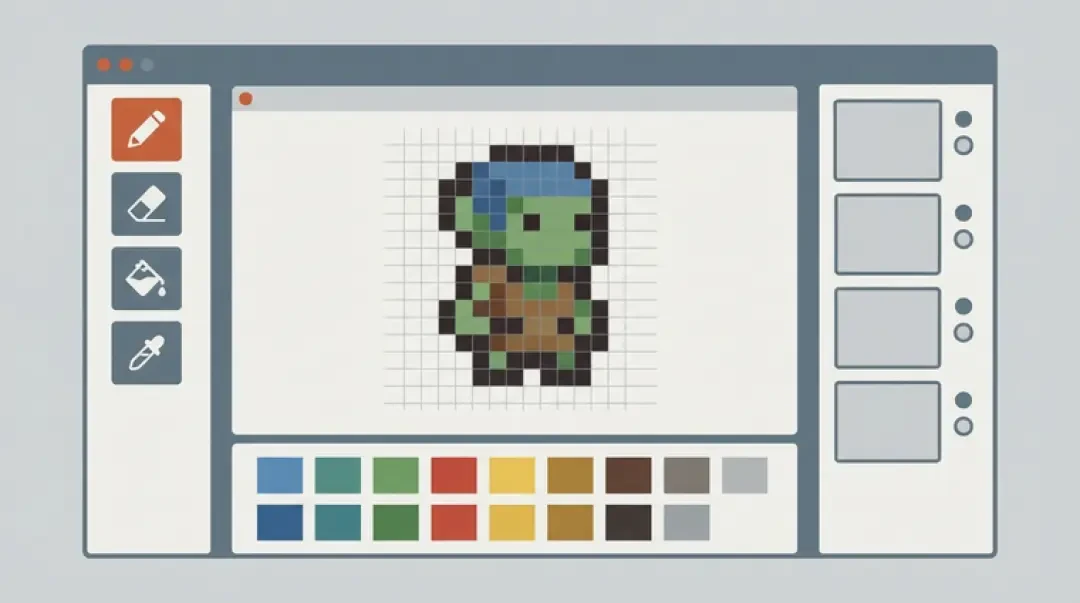
The canvas is the page. Above the fold you get a fixed-size bitmap grid, a pencil that writes one pixel per click, an eraser that writes the transparent value back, a palette strip, and an export button that writes a PNG. Left click draws, right click or a modifier key erases, and the middle of the canvas always shows the true pixel boundary rather than a scaled guess.
Understand the difference between canvas size and view size before you draw anything. A 32x32 canvas displayed at 800x800 is still 32x32 pixels of data. Zoom changes how large the pixels render, never how many exist. Exporting while zoomed in still writes a 32x32 file, which is correct behaviour and surprises almost everyone the first time.
The one setting beginners get wrong is grid size chosen after the drawing rather than before. Someone sketches a character on a 64x64 canvas, likes it, then wants it in a 16x16 tile game. Downscaling a hand-drawn 64x64 sprite to 16x16 by resampling destroys it: two-pixel details become grey smears, single-pixel outlines turn into two-pixel grey lines, and the colour count multiplies because every averaged edge invents a new value. If you already drew at the wrong size, redraw at the target size using the old version as a visual reference. That is faster and cleaner than any downscale, and it forces the simplification the smaller grid actually needs.
Upscaling later is safe. Downscaling later is not. Choose the smallest grid that can hold the details you need, and treat every pixel you spend as spent.
- PencilWrites one pixel per click in the active palette colour. No brush size, no soft edge, no pressure.
- EraserWrites alpha 0 back into the pixel. It does not paint white, which matters the moment you export with a transparent background.
- Palette stripHolds the active colours. Selecting a swatch sets both the pencil colour and the fill colour.
- PNG exportWrites the canvas at its native pixel dimensions as 8-bit RGBA with alpha preserved.
- ZoomChanges how large the grid renders on screen. It never changes the pixel count or the export size.
- Grid overlayOptional one-pixel guide lines drawn on screen only. They never enter the exported file.
Pixel Art Grid & Templates
People searching for a pixel art grid, a grid for pixel art, or drawing pixel art on a grid all mean the same object: a bounded field of squares where one square is one pixel and one colour. The grid is not decoration on top of the artwork. It is the resolution contract. A circle of radius 5 is not a circle, it is a specific staircase of single pixels that you either place by hand or accept from a template.
Templates exist because the first four rows of a circle, an isometric cube, or a 3/4-view character are tedious to derive from memory and easy to get slightly wrong. A template is a starting position, not a finished sprite. Paste the shape, then remove the pixels that do not belong to your character and repaint the outline so the light direction is consistent with everything else you have drawn.
Pixel Art Maker Grid Sizes, Explained
The size you pick is a budget expressed in pixels. An 8x8 sprite gives a face roughly 4x4 to work with, which leaves no room for an outline, an eye, and a mouth at the same time — you pick two. A 16x16 sprite fits a one-pixel outline and two tones per material. A 32x32 sprite finally has room for a light direction. Past 64x64 the temptation is to draw strokes instead of pixels, and the strictness that makes the style read starts to leak away.
Non-square grids matter for tiles. A 16x32 canvas is a standing character in a top-down game; a 32x32 canvas is a tile. Keep those two categories in separate files, because a character sprite and a tileset tile have different alignment rules when they reach the engine.
The Spreadsheet Route: One Cell, One Pixel
Some people build the grid in a spreadsheet, one cell per pixel, filling cells and zooming out to check whether the shape reads at a glance. It works, and it has one real advantage: you can copy a 6x6 eye block and paste it into every cell of a sprite sheet without re-drawing it.
The failure mode is the export. Spreadsheets render gridlines, borders, and cell padding. If you screenshot the sheet and crop, you inherit a one-pixel dark seam between every pixel and a slightly wrong colour on each cell edge. Turn off gridlines and borders first, set the zoom to an exact integer multiple, then crop on the pixel boundary rather than by eye. A dedicated canvas avoids the whole problem, which is why the spreadsheet is a fine planning tool and a poor production tool.
| Grid | What it is for | The constraint it imposes |
|---|---|---|
| 8x8 | Pickups, icons, tiny enemies | A face gets 3 to 4 pixels. You cannot fit an outline plus two facial features. |
| 16x16 | Classic character sprite | One-pixel outline only. Two tones per material, no third shade. |
| 32x32 | Hero character, portrait, detailed prop | Room for shading and a light direction, but still zero anti-aliasing. |
| 64x64 | Boss, detailed portrait | Size invites painted strokes. Every diagonal must still be an explicit staircase. |
| 128x128 and up | Illustration on a grid | You are drawing a small painting. Palette control gets harder, not easier. |
| 16x16 or 32x32 tile | Ground, walls, terrain tilesets | Edges must match neighbour tiles exactly. One stray corner pixel breaks the tiling. |
Draw vs Generate
Both methods fill the same canvas. Hand-drawing writes exactly the pixels you place. Generating writes a set of pixels that satisfies a description, and then you edit them. Neither is a shortcut past the other; they answer different questions.
Hand-drawing wins when you already see the silhouette. If you know the shape of the helmet, the exact spacing of the eyes, or how this character must line up next to four existing sprites, placing pixels is faster than describing them and correcting the result. Generating wins when you are exploring. If you know the idea — an armoured frog in side view holding a shield — but not the silhouette, generation gives you a starting position in one pass instead of forty decisions. Agent Sprite Forge generates sprites from a description directly into a grid you can keep editing, which matters because the output is a starting point, not a deliverable.
A Generated Sprite Always Needs a Cleanup Pass
Generated sprite output is plausible at thumbnail size and messy at 8x zoom. Typical damage: stray single pixels floating one square off the outline, breaks in what should be a continuous one-pixel outline, anti-aliased edges carrying colours that are not in your palette, and the sprite touching the canvas border. That last one is not cosmetic — a sprite that occupies the full canvas has no margin, so rotation, drop shadow, or any engine padding will clip it.
The fix is mechanical and takes a few minutes per sprite. Do it in the same order every time so you do not reintroduce problems you already fixed.
01
Lock the palette first. Convert every colour in the image to the nearest entry in your 16-colour set so the sprite joins the rest of the cast.
02
Find the outline breaks. Trace the silhouette at high zoom and fill gaps so the outline is exactly one pixel wide everywhere.
03
Delete halo pixels. Remove any pixel sitting diagonally off the outline that is not part of a deliberate shape.
04
Clear a one-pixel transparent margin on all four sides. The sprite should not touch the canvas edge.
05
Snap soft edges. Generated gradients and anti-aliased curves get replaced with explicit single-pixel steps.
06
Count the colours in the result. If it is above your budget, merge the two closest tones and repeat until it is not.
Online, Free, No Download
Free covers the full drawing loop: grid selection, pencil, eraser, fill, palette editing, and PNG export. It does not expire and it does not gate the export behind an account. Generation is the part with practical limits, because producing a sprite costs compute in a way that placing a pixel does not. Drawing and exporting are not rate-limited.
No account is required to draw or export. Nothing you draw is uploaded; the image stays in the browser tab and only leaves when you download it. The tradeoff of client-side editing is the same as any desktop app without autosave: closing the tab without exporting loses the drawing. Export when the sprite reads correctly, not when it is finished. Intermediate versions are cheap.
The export contains exactly the pixels. A PNG at the canvas's native dimensions, 8-bit RGBA, alpha preserved. If you drew on a transparent background, the background stays transparent — transparent is a value, not a colour, and it survives the export. If you drew on a filled background, that fill is baked into every pixel behind the character. If you want a background colour, paint one deliberately. If you want to composite the sprite over something later, leave the background empty and export as-is.
What a Free Pixel Art Maker Covers
The honest split is between generation and everything else. Editing, colour work, and file output run locally and behave identically whether you use the tool once or every day. Practical limits apply to generation, which is why the useful workflow is to generate a rough shape, then spend your time in the editor where nothing is metered.
Nothing in the export path adds a watermark, resamples the image, or renames the file to the canvas dimensions. What you drew is what you get.
- No installThe editor runs in the browser tab. There is no binary, no plugin, no launcher.
- No account for editingDrawing and export work without a login. No email required to download a PNG.
- Local editingYour image is not uploaded while you draw. It leaves the tab only when you export it.
- Exact-size exportA 32x32 canvas exports a 32x32 PNG, regardless of the zoom level you were working at.
- Transparency preservedPixels you erased stay alpha 0 in the exported file instead of turning white or black.
- Manual savingNothing autosaves. Export a version whenever the sprite starts reading correctly.
Palettes & Styles
Colour is a budget, not a preference. A 16-colour palette is a constraint that forces reuse, and reuse is what makes a sprite read as a single object rather than a pile of pixels. When the same mid-brown appears on the leather strap, the wooden handle, and the boot, the eye groups them and the character snaps into focus. A 256-colour palette is enough rope to hang a sprite with: it lets you add a new colour every time you hit a problem, and the result has no internal logic. Two sprites from the same artist with two unrelated 60-colour palettes look like they came from two different projects.
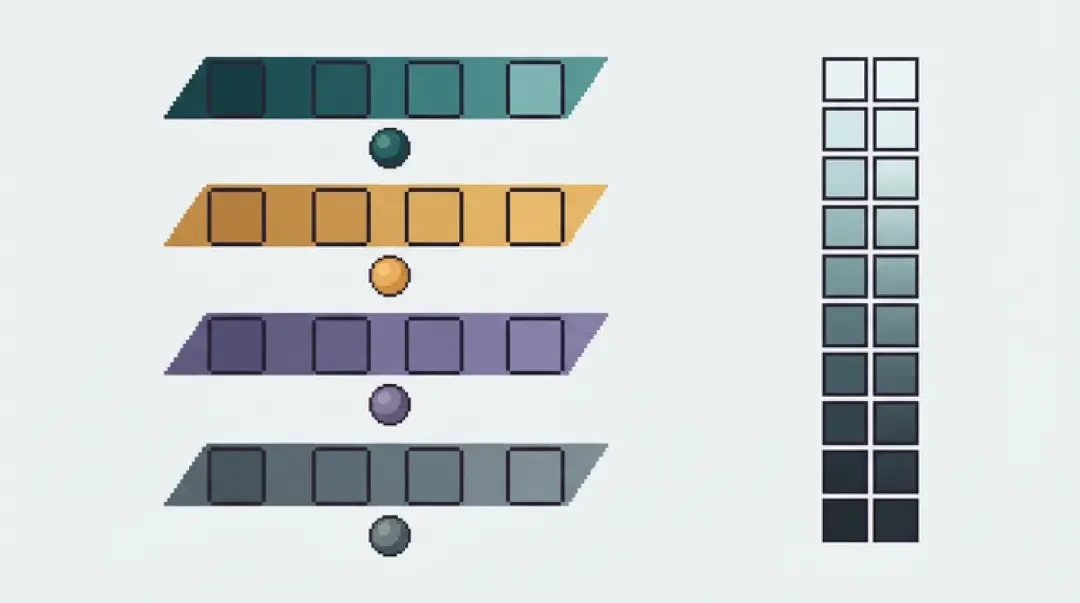
Build the palette as ramps instead of individual colours. A workable 16-colour set is five ramps of three tones, plus one dedicated outline colour. Each ramp is a base, a shadow, and a highlight. The base is your mid-tone. The shadow is the base pushed darker and shifted toward blue or purple, not just darkened — a shadow made by lowering brightness alone reads as dirt. The highlight is the base lightened and shifted toward yellow. On a 16x16 sprite, highlights should cover roughly a tenth of the pixels; more than that and the light source stops being directional.
Style comes from the rules you apply consistently, not from the colours themselves. A shared palette across an entire cast means the red on the player's tunic is the identical RGB value as the red on the enemy banner and the red on the health pickup. That is the whole trick. It costs nothing to enforce and it is the difference between a game that looks deliberate and a game that looks assembled.
Turn Your Pixel Character Into a 3D World
The handoff is one sentence: export the sprite at 100 percent, import it as a texture, and place it in the world at an integer multiple of the pixel grid so the pixels stay square.
The 3D game builder takes that texture and puts it on a plane that always faces the camera, so a 16x16 character reads as a 16x16 character from every angle instead of turning into a thin sliver when you walk sideways. Collision, gravity, and a follow camera are independent of the sprite, which means you can swap the artwork later without touching the character controller. Mini World is the smallest place to test the result: a small walkable area, one character, a few objects to bump into. The Cyclops' Island is the larger test, where terrain height and sightlines make it obvious whether the sprite's scale is right relative to the environment.
Scale is where most first attempts go wrong. Decide a conversion before you place anything — one pixel equals one world unit is too small on a 16x16 sprite and too large on a 128x128 one. Pick a factor so the character ends up roughly the height of a doorway, then keep that factor for every character in the project. A cast built at two different pixel-to-world ratios never looks right standing next to each other.
01
Export the PNG at 100 percent — the canvas size, not a scaled-up version. Upscaling before import throws away the only resolution you had.
02
Name the file after the character and its state, so the engine-side asset list stays readable when you have twenty of them.
03
Import the PNG as a texture in the 3D game builder and set the texture filter to nearest neighbour. Any smoothing filter blurs the sprite on every camera angle.
04
Set the pivot to bottom-centre so the character's feet sit on the ground plane instead of its middle sinking into it.
05
Place it in Mini World first at your chosen pixel-to-world factor and walk toward it. If the outline shimmers, the factor is not an integer or the filter is not nearest.
06
Move the same asset into The Cyclops' Island and check the scale against terrain and doorways before you build a second character.
Scaling & Upscaling Without the Blur
Pixel art has hard edges by construction. Every smoothing filter — bilinear, bicubic, Lanczos — works by averaging neighbouring pixels, and averaging two palette colours produces a third colour that is not in your palette. That third colour is the blur. It is not a rendering setting you can undo later; once an image has been resampled, the original hard edges are gone.
Upscale only in integer multiples: 2x, 3x, 4x, 8x. A 16x16 sprite at 4x is 64x64, and every source pixel becomes a clean 4x4 block. At 2.5x, some source pixels become 2 pixels wide and others become 3, so the sprite develops visible unevenness across the grid — outlines that are thick in one place and thin in another. There is no way to fix that after the fact except to re-export at an integer multiple.
The setting that silently ruins a crisp sprite is the resample filter, which different tools label Interpolation, Resample, Resample Image, or a Smooth checkbox next to Scale. It defaults to a smoothing mode in most editors and image viewers, and it re-filters the image every time you use it. Set it to Nearest Neighbour before you touch the dimensions. The same rule applies outside the image editor: a texture imported into a 3D engine needs its minification and magnification filters set to nearest, with mipmaps disabled for pixel textures, or the engine will smooth it when the camera moves. On a web page, the equivalent is the image-rendering property set to pixelated — otherwise a browser scaling a 32x32 PNG to 96 pixels wide applies its own smoothing and undoes your work at the last step.
One more: never let a UI scale your sprite by a percentage. A container that sizes the image to 100 percent of a flexible width will land on 2.3x or 3.7x depending on the window, and the sprite will look different on every screen. Render at the native pixel size and scale by an integer factor, or set the display size explicitly.
Walk into the world it belongs to
A sprite is a character with nowhere to stand. The last step is the one nobody else offers: take the sheet you just built and put it in a world someone can walk around in — a small island, a planet, a rainy street corner. Every world on this site was made from one written description and published as a page you can play.
FAQ
Is the pixel art maker free? +
Yes. Drawing, palette editing, and PNG export are free and not rate-limited. Generation has practical limits because producing a sprite costs compute, so the efficient loop is to generate a rough shape, then do the cleanup and detail work in the editor.
Do I need an account to use it? +
No. Drawing and export work without a login, and nothing you draw is uploaded while you work — the image stays in the browser tab until you download it. Because there is no autosave, export a version whenever the sprite starts reading correctly.
What grid sizes can I use? +
Any size, with the useful ones being 8x8 for icons, 16x16 for classic character sprites, 32x32 for hero characters, and 64x64 for detailed work. Non-square canvases like 16x32 are supported for standing characters. Pick the size before you draw, because downscaling finished pixel art by resampling destroys outlines and multiplies the colour count.
Can I use my own palette? +
Yes. Palettes are lists of colour values, so you can enter exact hex codes, sample a colour from the canvas with the eyedropper, or paste in a ramp you already use. The practical constraint is count rather than source: a 16-colour set is usually enough for a full cast and forces the reuse that makes sprites read.
Can I animate frames? +
You draw and export frame by frame. Keep the canvas size identical across every frame and keep the character's feet on the same row, or the sprite will jitter when the frames play. Name the files in order with the frame index so assembling them later is mechanical.
What format does it export? +
PNG at the canvas's native pixel dimensions, 8-bit RGBA. Transparency is preserved, so pixels you erased stay alpha 0 instead of turning white or black. The file is never resampled or smoothed on export.
Can I use the sprites commercially? +
The artwork you draw is yours to use, including in commercial projects. Two things to watch: do not generate or reproduce a character you do not own the rights to, and check the licence of any third-party asset pack you combine your sprites with, since those terms vary by author.
Can I make a sprite sheet? +
Yes, by exporting each frame at 100 percent and assembling them into a single strip or grid. Keep every frame the same canvas size, keep the frame width a power of two when you can, and record the exact frame dimensions — an engine needs that number and a one-pixel mistake there shifts every frame in the sheet.
Back to the 3D Game Builder
All 31 finished 3D worlds, games and scenes live on one page — every one of them playable.