Blender UV Unwrap & Quad Remesh — Game-Ready Workflow Guide
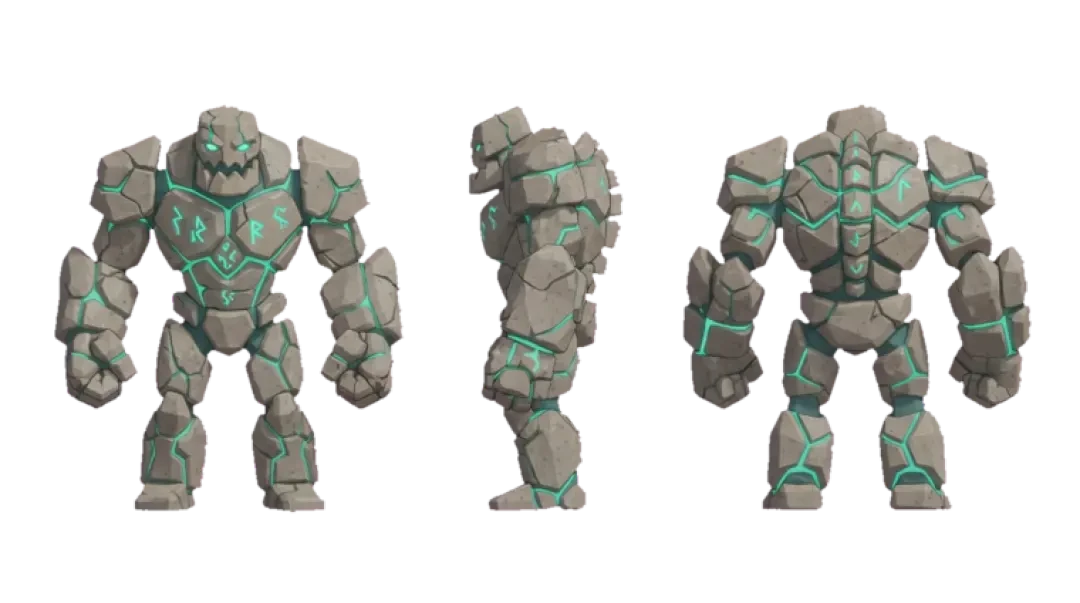

Make your own blender uv unwrap
Learn UV unwrapping and quad remeshing in Blender for game-ready assets — seams, projection, texel density, and a remesh pass that keeps your topology clean. Includes real before/after models you can spin.
UV unwrapping in Blender is a coordinate mapping step, not a texturing step. You are flattening a 3D surface into a 2D plane so that a 2D image can be addressed by every polygon without distortion. The U axis runs horizontally across the UV grid, the V axis runs vertically. When you unwrap a cube, Blender cuts along edges and lays the six faces out flat inside the 0–1 square. That square is the only place a texture can live. Everything outside it is unused or wrapped by tiling settings.
This guide covers the Blender UV unwrap workflow for game-ready assets, then the quad remesh pass that has to happen before it. The order matters: sculpt, remesh, unwrap, bake. If you unwrap a dense sculpt and then remesh, the UV islands no longer correspond to the final topology and you redo the unwrap. The same rule applies when you bring a model into Neta Studio's 3D game builder: clean quads and consistent texel density survive the trip, messy triangles and uneven islands do not.
TL;DR: Four Things That Decide Your UVs
If you read nothing else, read these four. They cover the decisions that cause the most rework on game assets.
- Unwrap is a coordinate map, not a textureThe UV layer stores a U,V pair for every mesh loop. It does not contain pixels. You can unwrap a model and still have no idea what it will look like until a material reads that map.
- Smart UV Project covers most game assetsFor hard-surface props, weapons, and architecture, Smart UV Project at a 66-degree angle limit produces usable islands with near-zero manual seam work. Use it before you reach for manual marking.
- Mismatched texel density reads as blurIf one island has half the texel density of another, the low-density island looks soft even when both use the same 2K texture. Keep islands within about ten percent of each other or the difference is visible.
- Remesh then unwrap, not the reverseA remesh rebuilds topology. Any UVs created before it are invalidated because the mesh loops no longer exist. Always complete sculpt and remesh before you mark a single seam.
What UV Unwrapping Actually Does
Think of a box made of paper. Cut along specific edges, unfold it, and lay it flat on a table. That flat sheet is the UV layout. The cut edges are seams. Each vertex on the 3D box now has a coordinate on the flat sheet: U for the horizontal position, V for the vertical. The 0–1 square is the texture space. When a material samples an image, it reads the UV coordinate of each fragment and pulls the color at that spot.
Unwrapping is not texturing. A mesh can have perfect UVs and no material, or a material and broken UVs. The unwrap step only defines where on the image each polygon looks. If you skip it, Blender applies a default projection that stretches on curved surfaces and overlaps on mirrored geometry. The result is a model that appears to have a texture until you look closely.
One line that keeps people out of trouble: if you cannot describe where a face sits in the 0–1 square, you have not finished the unwrap. The UV editor shows you that square. The 3D viewport does not.
The Unwrap Shortcut Everyone Uses
In Edit Mode, select faces, press U, and choose Unwrap. That is the standard path. Blender runs the selected unwrap algorithm on the selected faces and writes the result into the active UV layer. If nothing is selected, it operates on everything visible, which is rarely what you want on a complex mesh.
The variant most people actually use is Smart UV Project. Same U menu, different entry. Smart UV Project does not ask you to mark seams first. It projects the mesh from multiple angles, detects sharp angles, and packs the resulting islands automatically. For a game prop with flat panels and hard edges, it is faster and more predictable than manual seam placement.
The shortcut table below lists the keys you will use most in the UV editor and the 3D viewport. Learn these and you avoid hunting through menus on every asset.
| Action | Shortcut | Context |
|---|---|---|
| Unwrap menu | U | Edit Mode, 3D Viewport |
| Mark seam | Ctrl+E, Mark Seam | Edit Mode, edge selection |
| Clear seam | Ctrl+E, Clear Seam | Edit Mode, edge selection |
| Select linked | L | Edit Mode, hover over island |
| UV editor toggle | Shift+F10 or workspace tab | Any mode |
| Pack islands | Ctrl+P in UV editor | UV Editor, island selection |
Smart UV Project vs Angle Based vs Conformal
Blender ships three main unwrap algorithms, plus a few specialized ones. The table below lists what each does, where it wins, the angle threshold that matters, and when to avoid it. For hard-surface game assets, Smart UV Project at a 66-degree limit is the default recommendation. It handles the sharp angles that define panels and bevels without manual seam work, and it produces islands that pack efficiently.
Angle Based and Conformal are older algorithms that operate after you have marked seams. Angle Based preserves angles between edges, which reduces stretching on organic shapes. Conformal preserves conformal angles and tends to produce more distortion on curved surfaces but fewer overlaps on flat ones. If you are unwrapping a character head, Angle Based with manually marked seams is usually the better choice. If you are unwrapping a crate or a rifle, Smart UV Project is faster.
The angle threshold in Smart UV Project controls how aggressively Blender splits the mesh into islands. A lower threshold produces more islands and follows sharper detail. A higher threshold produces fewer islands and can bridge across edges you wanted separate. At 66 degrees, most hard-surface geometry splits at the bevels and panel lines where you would have marked seams anyway.
| Algorithm | Best for | Angle threshold | When not to use it |
|---|---|---|---|
| Smart UV Project | Hard-surface props, weapons, architecture, quick blockouts | 66 degrees (default 66°) | Organic sculpts with smooth curvature and few hard edges |
| Angle Based | Organic characters, creatures, faces, hands | N/A — uses marked seams | Meshes with many sharp angles; produces more overlap |
| Conformal | Flat panels, mechanical parts, low-distortion planar faces | N/A — uses marked seams | Curved organic surfaces; higher stretch on spheres |
| Lightmap Pack | Baked lighting or ambient occlusion maps | N/A — packs per-face | Textured color maps; overlaps unless every face is unique |
Seams: Where to Cut
A seam is an edge where the mesh is cut so it can unfold. Seams are not visible in the final render as long as the texture matches across the cut or the cut sits on a hidden face. Where you place them determines how much distortion the unwrap algorithm has to resolve.
Four rules cover most cases. First, hide seams on faces the camera never sees: undersides, inner surfaces, the back of a head, the inside of a helmet. Second, cut along hard edges where the surface already breaks. A bevel line is a natural seam because the two faces do not share a smooth normal. Third, cut at material boundaries. If a prop has a metal section and a rubber grip, each material wants its own island so texel density can differ if needed. Fourth, use as few seams as possible. Every seam adds a boundary and increases the chance of a visible mismatch when the texture does not tile perfectly.
Three illustrative cuts. On a rifle: seam along the top of the barrel, down the back of the stock, and under the magazine well. On a character head: seam down the back of the skull, under the jaw, and behind the ears. On a crate: seam along one vertical edge, around the top rim, and around the bottom rim. These cuts let the mesh unfold into a few large islands instead of dozens of fragments.
Texel Density and Why Your Textures Look Blurry
Texel density is the number of texture pixels that land on a given area of the 3D surface. You calculate it by dividing texture resolution by island size in UV units. If a 2048-pixel texture is spread across a two-meter island, the density is 1024 pixels per meter on that island. If another island is half a meter but still uses the same 2048-pixel texture, its density is 4096 pixels per meter. The first island looks blurry next to the second even though both use the same image.
The practical rule: keep islands within about ten percent of each other in texel density. Blender does not enforce this automatically. Smart UV Project packs islands for space efficiency, not density consistency. You check it in the UV editor by enabling the Stretch overlay or by comparing island sizes in the 0–1 square against the surface area they represent. A 50 percent density difference is visible on a 2K texture. A 10 percent difference is not.
If you need different density for different parts, that is fine. A hero weapon and a distant background prop can use different densities because they sit at different distances from the camera. But within a single asset, consistency matters more than absolute resolution. A uniform 512 pixels per meter looks better than a mix of 256 and 1024.
Check Your UVs Before You Export
Three checks catch almost every UV problem before it reaches the exporter. Run them in the UV editor with the 3D viewport visible so you can see both the map and the surface at the same time.
First, stretched faces. In the UV editor, turn on the Stretch overlay or use the Display > Stretch option. Faces that are stretched relative to their 3D shape show as red or blue. If you see large red areas on a curved surface, the unwrap did not preserve area well. Rotate the island, add a seam, or switch to Angle Based for that section. Second, overlapping islands. Overlaps mean two faces occupy the same spot in the 0–1 square and one will hide the other. Select all in the UV editor and look for islands that sit on top of each other. Blender does not warn you. Third, out-of-range islands. Islands pushed outside the 0–1 square sample nothing from the texture unless the material uses tiling. In the UV editor, enable UV > Constrain to Image Bounds or check the corners manually. Anything outside 0–1 is a problem for a one-to-one texture map.
The fastest way to reveal all three is to select the whole mesh in the UV editor and use Pack Islands (Ctrl+P) with a small margin. That does not fix stretching or overlaps, but it makes out-of-range islands obvious because they move back into the square. If your UVs suddenly look correct after packing, they were out of range. If they still overlap, you have a real overlap to resolve.
Quad Remeshing for Game-Ready Topology
A sculpt has triangles, dense areas, and uneven edge flow. A game-ready mesh has quads, uniform density, and clean edge loops that deform under animation. Quad remeshing converts the first into the second. Blender has a built-in remesher called QuadriFlow, available in Sculpt Mode under Remesh. It is free and produces quad grids on most sculpts. The paid alternative is a dedicated remesher such as Exoside Quad Remesher, which handles complex shapes with fewer artifacts and gives you direct control over target face count and symmetry. For hard-surface models, you often do not need either: model with clean topology from the start.
The workflow order is sculpt, remesh, unwrap, bake. Sculpt first to get the form. Remesh second to get game-ready topology. Unwrap third so the seams and islands follow the final edge flow. Bake fourth to transfer detail from the high-poly sculpt to the low-poly remeshed mesh. If you swap remesh and unwrap, the remesh rebuilds the mesh loops and your UV coordinates are discarded. Blender may keep the UV layer name but the coordinates no longer map to the new faces. You redo the unwrap.
The same order applies when you export to a game engine or bring an asset into Neta Studio. A remeshed asset with clean quads unwraps predictably. A triangulated sculpt with no remesh pass unwraps into hundreds of small islands that are expensive to pack and hard to texture consistently.
01
Sculpt the high-poly form in Blender or import it from a sculpting tool.
02
Run QuadriFlow (Sculpt Mode > Remesh > QuadriFlow) or your paid remesher. Set target face count to what the game engine can afford.
03
Check the remesh result for artifacts: pinching, lost detail, or uneven quad sizes. Fix these before moving on.
04
Mark seams and unwrap the remeshed mesh. Keep islands within about ten percent texel density.
05
Bake the high-poly detail onto the low-poly mesh using Cycles or a dedicated bake tool.
06
Export as .glb and verify the UVs survived by reimporting the file into Blender.
Auto-Rigging After Remesh
Rigging does not change your UVs. It changes the mesh's vertex groups and armature modifier, but the UV layer stays in place. You can rig before or after unwrapping. The practical reason to rig after remesh and before final texturing is that you want to test deformation on the game-ready topology, not on the sculpt.
Three routes. First, Blender's built-in rig: add an armature, parent the mesh with Automatic Weights, and let Blender calculate bone influence. It is free and works for simple humanoid or mechanical rigs. It struggles with complex costumes or unusual proportions. Second, an external auto-rigger such as Mixamo or a standalone tool: you upload or import the mesh, it returns a rigged skeleton. It is fast for standard humanoids but gives you less control over bone placement and weighting. Third, an AI rigger such as the one in Neta Studio's Agent Sprite Forge: it generates a skeleton from the mesh and handles weighting. It is the sane choice when you want a rigged character in the browser without leaving the tool, and you do not need to hand-tune every bone.
The decision rule is simple. If the character is a standard humanoid and you need it working today, use an auto-rigger. If the character is unusual or you need precise deformation, use Blender's built-in rig and paint weights manually. If you are building inside a browser-based 3D world builder and want the character to walk immediately, use the AI rigger and accept that you will refine weights later.
Exporting to .glb Without Breaking Your UVs
Three export settings quietly discard UV work. First, the UVs export option. In Blender's glTF exporter, under Data > Mesh, there is a checkbox for UVs. If it is off, the .glb contains no UV coordinates and every material samples from the wrong place. Turn it on. Second, the active UV map. If your mesh has multiple UV layers and the active one is not the one you unwrapped, the exporter takes the active one by default. Set the correct layer as active before export. Third, material export. If you export without materials, the .glb has no texture references, but the UVs are still there. The problem is the opposite: if you export with materials and the material uses a texture that is not packed, the .glb references a missing file. Use File > External Data > Pack Resources before exporting.
The settings that keep your UVs: Format glTF Binary (.glb), Include UVs on, Include Normals on, Include Materials on, and Compression off unless you are using Draco and have verified it preserves the UV layer. Draco compression can alter precision, so test a small asset before compressing a whole library. For compressing the final .glb without breaking UVs, use a tool that operates on the binary container rather than re-encoding the mesh data.
After export, reimport the .glb into a fresh Blender scene and check the UV editor. If the islands are there and the texture lines up, the export is clean. If the islands are missing, the UV option was off. If the islands are there but shifted, the active UV layer was wrong.
Common Errors and Fixes
These are the eight UV symptoms that come up most often, with the cause and the fix in UV terms. None of them are animation problems, even when they look like one.
| Symptom | Cause | Fix |
|---|---|---|
| Texture appears stretched on a curved face | Unwrap did not preserve area; island is too small for the curvature | Add a seam along the curve or switch to Angle Based for that island |
| Texture is blurry on one part of the model | Texel density is lower on that island than on the rest | Scale the island in the UV editor until density matches within ten percent |
| Two faces show the same texture detail | Overlapping islands occupy the same 0–1 space | Select overlapping islands in the UV editor and move them apart, then repack |
| Texture is missing entirely on one face | UV coordinate lies outside the 0–1 square | Enable Constrain to Image Bounds or manually move the island inside |
| Seam is visible as a line across the surface | Texture does not match across the cut | Move the seam to a hidden face or make the texture tile across the boundary |
| Smart UV Project produces hundreds of tiny islands | Angle threshold is too low for the geometry | Raise the angle limit to 66 degrees and repack |
| Remesh deleted the UVs | Remesh was run after unwrap | Re-unwrap after remesh; always remesh before unwrapping |
| Exported .glb has no texture | UV export was off or the active UV layer was wrong | Enable UVs in the exporter and set the correct layer as active |
Walk into the world it belongs to
A sprite is a character with nowhere to stand. The last step is the one nobody else offers: take the sheet you just built and put it in a world someone can walk around in — a small island, a planet, a rainy street corner. Every world on this site was made from one written description and published as a page you can play.
Back to the 3D Game Builder
All 31 finished 3D worlds, games and scenes live on one page — every one of them playable.